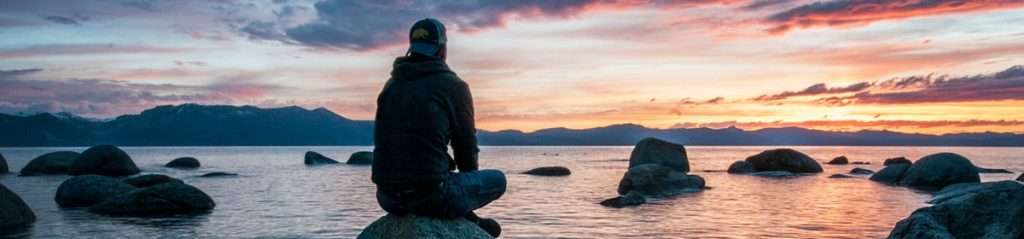
Inspired by Arash Sayadi’s recent blog about his experience hiking up to Santiago Peak, my friends Jason, Tony and I made plans in December of last year to follow suit and attempt the same hike. After all, I have to stare at that mountain every day on my way to work and I had been wondering what’s it’s like to make the trek to the peak.
Our planning, apart from selecting a date that would work for all of us, revolved around what to pack and wear, navigation and how much water we should bring. After bugging Arash with some additional questions and utilizing his day hike pack list, we had most of the information we needed. I used an Osprey Stratos day pack with 34 l capacity which had enough room to store food, water, clothing and various supplies and emergency equipment. Water was probably the most important factor. Based on the 0.75 quarts per hour formula, I concluded that we had to bring close to 6 l of water each. The pack was able to hold a 3 l bladder and so I added 2 plastic bottles with water separately, with the total being 5.5 l. Quite a weight to carry!
Tony found a web site with current weather conditions at the peak, which was very helpful in planning what to be prepared for. When we started watching the site a few days before the hike, it had just snowed at the peak and temperatures were in the 30s with plenty of wind. So we knew we had to be ready for cold temperatures and hence brought several layers that could be shed in case it wasn’t as cold. Fortunately, as our target date approached, we saw that the temperature started to go up during the day as things warmed up.
Being concerned about navigation, I opted to buy a Garmin eTex (Vista HCx) GPS as well as 24k topographical maps for the unit. I didn’t want to rely on my iPhone and its MotionX GPS app because I had seen the GPS drain a full iPhone battery in about 7 hrs before and the phone was not going to do well in potentially low temperatures and/or moisture/rain. Not a cheap addition to my equipment, but the peace of mind of having a reliable GPS (and a sale at REI) helped.
On the day of the hike (February 18), we left Irvine around 5:40 AM since we wanted to start early and get going while it’s still cool. The weather forecast fortunately promised clear, sunny conditions and little wind. As advised, we took a high-clearance SUV and were able to get to the parking lot by 6:30, despite the “road” being quite bumpy and full of challenges a sedan would’ve found tough to maneuver.
 We were the second car in the parking lot and started our hike around 6:40 AM. It was lousy cold with temperatures in the 30s and I was happy I had gloves and an ear band to wear. After crossing a creek a few times, we worked our way up to higher elevations and as we got out of the shady areas, it quickly warmed up and we dressed down to shorts and t-shirt within an hour of starting.
Since the water added quite a bit of weight to our packs, we – as planned – dropped 1l bottles after about 1.5 hours into the hike in the bushes next to the trail and marked the position on the GPS.
 Once we transitioned from the Holy Jim trail to the Main Divide Road, we soon started encountering patches of snow and slush. As we got higher up, those patches become more frequent and the temperature dropped, especially in areas where the sun didn’t reach the ground. So towards the end we found ourselves wading though half a foot of snow or slush, which made walking difficult and sometimes slippery and wet.
The least two miles of our ascent were probably the most strenuous. All the while we could see the huge antennas and they seemed so close and within reach, but the road kept twisting and turning and it took much longer than expected to make it all the way to the top. When we reached the peak, we had excellent conditions with lots of sun, little wind, and a great view all around. So we spent about an hour up there and refueled with plenty of water, energy bars, cheese and salami.

As we descended the Main Divide road back down, we didn’t take it all the way back, but decided to use a smaller side trail instead, which we thou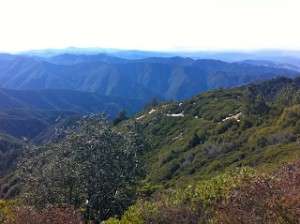 ght we had seen marked as Upper Holy Jim earlier. This trail was narrow and much steeper as it quickly serpentined down the hill. It definitely seemed to be a shortcut going back down. Due the steeper angle, it would definitely not have been a good idea to take this trail up, but going down was quite feasible. When this side trail finally connected back to the main road, we used the GPS to determine which way to go to return to the Holy Jim trail.
ght we had seen marked as Upper Holy Jim earlier. This trail was narrow and much steeper as it quickly serpentined down the hill. It definitely seemed to be a shortcut going back down. Due the steeper angle, it would definitely not have been a good idea to take this trail up, but going down was quite feasible. When this side trail finally connected back to the main road, we used the GPS to determine which way to go to return to the Holy Jim trail.The rest of the descent was uneventful and for the most part seemed easier than going up the mountain. We definitely had enough of going uphill and our legs started feeling fatigued at this point. More than ever, I appreciated having hiking poles. Not only were they useful during the ascent and in the snow, they now took a lot of stress off my knees as we came back down.
With the help of the GPS, we located the spot where we had dropped off the water earlier (fortunately, it was still there!) and put the bottles back in our packs.
As we reached the point towards the end of the trail where we could’ve taken a little detour to Holy Jim Falls, we decided that we were too tired and continued back down to where we had left the car. As we reached the parking lot, we saw that it was now completely packed and had filled up with cars throughout the day. When we started off, the location had felt quite remote and desolate, but now it was more like the parking lot of Disneyland with plenty of people making it up the lower part of the trail (few of which – I surmise – would make it very far up the mountain).
In total, the hike took us around 7:45 hours, around 6 of which for hiking the 16.3 miles. So apart from the break on the peak, we must’ve taken around 45 mins of short breaks here and there. I consumed only a total of 3.75 l of water despite my load of 5.5 l. On a hot day though, I would’ve drunk more, if not all, for sure. I didn’t use all layers of clothing I had brought either, but as with water, you’ll want to be prepared for the less favorable scenarios and you never know exactly what conditions you’ll encounter.
Did it pay off to have a “real” GPS instead of just using the iPhone? I think the answer is yes. With its resistance to tougher conditions (temperatures and moisture), battery life of over 20 hours and independence of 3G/data connectivity, it’s definitely a better “fit” for outdoor adventures. Its GPS chip set is also providing more precise location tracking, so it came in handy when locating the water bottles we had dropped.
Driving back from the trail towards Irvine, we stopped at the renowned Cook’s Corner for a beer. I’m sure us three slightly limping, sweaty, and exhausted-looking guys in dusty hiking clothes fit right in with all the hardcore bikers and their leather jackets.
Looking back, hiking to Santiago Peak was definitely a worthwhile and rewarding experience and accomplishment. While I’m personally not inclined to strive for even more challenging hikes like Mt. Whitney, I’m hoping to explore more of the OC mountain trails in the future.

Leave a Reply